
We've been watching the classic 'NorthWest Passage' starring Spencer Tracey. To complement it, Ray Mears (one of these guys who can live indefinitely in the wilderness on some maggots & tree bark!) had a program on the BBC about the Rogers Rangers mission as well. Now we're on a roll, out came 'The Last of the Mohicans', more inspiration!
SO! What better than a French Indian Wars game based on a Indian raid on the British Colonial farms. Jack had a hard time deciding which side to be, but opted for the Indians & French. It would be a different game, rather than the stand up fights we're used to. The basic troop type would be the DBA 15-19K 'Jager' both French (Indians & Coureurs de Bois) & British (Rangers, Colonial Militia & Hawkeye himself!). Some Muskets would be involved, but these would be used a sideshow.
FIW French Raiding Party
8 x Jg(Indians), 2 x Jg(Coureurs de Bois),
3 x Mk(Regular French Line), 1 x General
FIW British
3 x Jg(Rogers Rangers), 2 x Jg(Colonial Militia),
1 x Jg(Hawkeye & Chums), 6 x Mk (British Line),
1 x Cv(British Horse), 1 x General
13 elements a side. This gave the French a slight advantage, as ALL the French would be on the table at the start. The British Muskets would be reinforcements & arrive at a random time...
(turn two - a 6 needed, turn three - a 5/6 needed, etc.)
The French mission would be for the Indians to raid & destroy the farms. A element would have to reach the building & spend the next turn setting fire to the joint. A destroyed farm would count as a element killed. The French would need 4 for victory the British 5 for victory. To keep up the spirit of the game, the Indian Raiders would have to achieve their victory total & successfully leave the battlefield by Jacks table edge. Obviously the British would be up against it, especially in the first few rounds. However as the game progressed & the eventual arrival of the British Regulars, the tables would be turned. The French Regulars would act as a diversion, their mission to advance up the road & block the British reinforcements.
Command radius & PiP allocation would be different as well. The Jager elements would not need to be within the command radius of the respective Generals, only the Muskets. For the French one PiP would always go to the Regulars though.
Of course we could not have a game without Hawkeye & Magua. Hawkeye & Indian chums would get a +1 modifier to shooting & combat. Magua a +1 to combat. Also to add spice to the game, all the moves were played at speed, PiPs & moves all within a minute!!
Terrain, there would be lots of it! Four Woods, fields would just be for show, river only crossable at the ford. Two roads with three entry points. The Farms were not meant to be be defended so not classed as a BUA.
______________________________
The Battlefield, set up & direction of attacks.
The British Muskets would start off table until the required die roll was made.

______________________________
View of the British positions & Farms.


______________________________
View North of the British positions.

______________________________

______________________________
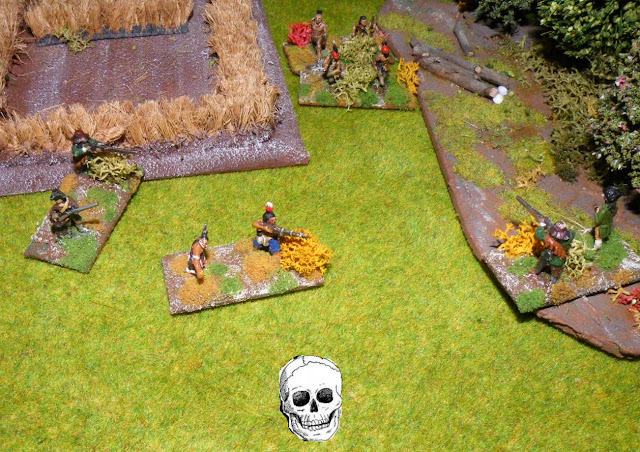
The Indians & French attack! Poor Ma McPherson can only look on in horror.

______________________________
PA! PA! Injuns a coming!


______________________________
The dandy French Regulars advance.


______________________________
Could the British Cavalry arrive in time to help?


______________________________
Jacks PiPs are super & he's soon ready to burn the first farm!

______________________________
Typically my PiP rolls are poor, the British are slow to react.

______________________________
Typically my PiP rolls are poor, the British are slow to react.

______________________________
Nice view across the Battlefield.


______________________________
Hawkeye attacks!


______________________________
Jacks chuckling away, the McPherson spread is burning & 'Ma' has been scalped. However Hawkeye, the Rangers & the Militia are on the attack.


______________________________
Superb Musketry from Hawkeye, scratch one Indian Raider!

______________________________
Oooh! Jacks not happy, the Militia take out another Indian Raider!


______________________________
Oooh! Jacks not happy, the Militia take out another Indian Raider!

______________________________
Hoorah! Hoorah! The British Regulars arrive.


______________________________
The Militia & Rangers manage to get in good positions, surely another Indian is about to fall?


______________________________
NO! Jacks die rolling is spot on, the Rangers fall to Indian Musketry.

______________________________
Rock Hard! With the McPherson spread burning, Hawkeye takes on all comers!

______________________________
BACK You SAVAGES! Screams Ma Thomas.

______________________________
BACK You SAVAGES! Screams Ma Thomas.
Jacks Indians reach another Farm.


______________________________
More Indians.


______________________________
It's a savage fight in the centre, Hawkeye needs help soon.


______________________________
Another Hoorah! Some Rangers arrive & save the Thomas farm.


______________________________
And Another Hoorah! More British Regulars arrive.

______________________________
Overall view at about turn six.

______________________________
Overall view at about turn six.

______________________________
Hawkeye retreats & awaits help.
Could Jack get the rest of the Raiding Party forward?


______________________________
There's no mercy for the Indians. The Rangers engage & the Militia cut off the Indians escape.


______________________________
The French & British Regulars square each other up.


______________________________
Ma Thomas looks on very relieved, more dead Indians.

______________________________
The Militia & Indians engage in a firefight.

______________________________
The Militia & Indians engage in a firefight.

______________________________
Jacks screaming out loud, down go the heroic Militia.


______________________________
Hawkeye & the Rangers fight the Wild Hairy Frenchmen,
while the Indian Raiders sneak round the side.


______________________________
Honour demands it! No side gives ground & a ferocious firefight takes place.
Which side would break first? It was to be the British, only recoiling though!


______________________________
Magua takes out the final Colonial Militia, Jacks is on the edge of Victory.

______________________________

______________________________
The French & Indians have led a successful Raid, Victory is within Jacks grasp. All he has to do is now break off & leave the field. NO! The bloodlust is up, he launches his force against the British.

______________________________
One of the Rangers takes out some Indians in fierce hand to hand combat.


______________________________
HA! The other remaining Ranger destroys one of the French 'Coureurs de Bois'. However the British Cavalry is forced back by the stubborn Indians.


Final positions.

______________________________

______________________________
Superb & what a laugh! Playing at speed also increased the drama, mistakes were made by both of us. Jack should of left the field when he had the chance though! Ah the lure of burning one more farm..... Jack now wants to play the Rogers Rangers attack on the Indian village straight from the film, Oooo we're going to have to paint more Rangers!


